As you know, a Wi-Fi network allows you to connect your devices to the internet without a bunch of wires. Thus making it super easy and simple.
Any device that can receive a Wi-Fi signal can connect with your network, and it makes your network unsafe.
To protect your network from unauthorized users, you need to make your Wi-Fi network password-protected. So that only authorized persons can access the network.
By default, routers use simpler passwords so that anyone can access the network. To protect your network, you should immediately change the Wi-Fi password and user name after purchasing a new router.
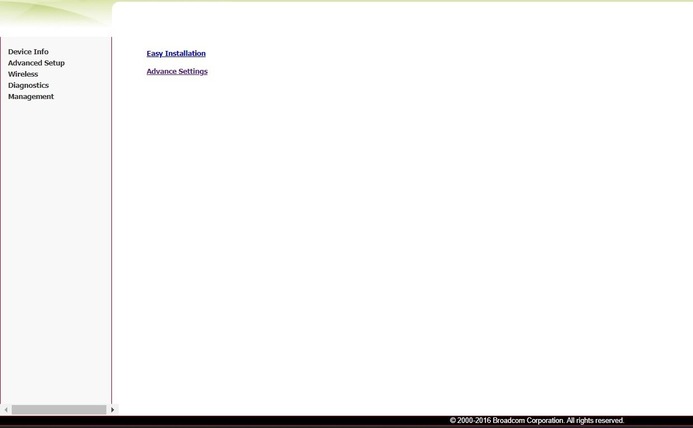
To change the Wi-Fi name and password, you need to access the admin panel of the router. Don’t worry, it’s easy.
How to log in to the admin panel of the router?
Before changing the Wi-Fi name and password, you have to access the admin panel of the router.
To access the admin panel, you need to know the IP address or default gateway IP address.
This IP address is usually written on the backside of the router or in the user manual.
How to change your Wi-Fi Router Password?
Once you get the IP address of your router, you’re now ready to change the Wi-Fi password.
- Open the web browser on your PC, such as Chrome, Safari, Firefox, or Opera.
- Type the IP address of your router in the address bar of the web browser and hit enter. Some common and famous IP addresses for routers are 192.168.1.0, 192.168.1.254, 192.168.0.1, and 192.168.10.1. Find your router’s IP address.
- Now, you’ll see the login screen where the router will ask you to type your username and password to access the admin panel of the router. You can view the default username and password at the backside of your router under the IP address. Or you can find the login credentials of your router in the user manual.

- Once you get the login details of your router, now, type the username and password and hit enter. Here, you’ll see the admin panel of the router.
- Find the Wireless Setting, Wireless, Wi-Fi, or WLAN settings in your router’s admin panel. Usually, you can find this on the left side menu or the top menu of the router’s admin panel. Depends on the manufacturer of the router.
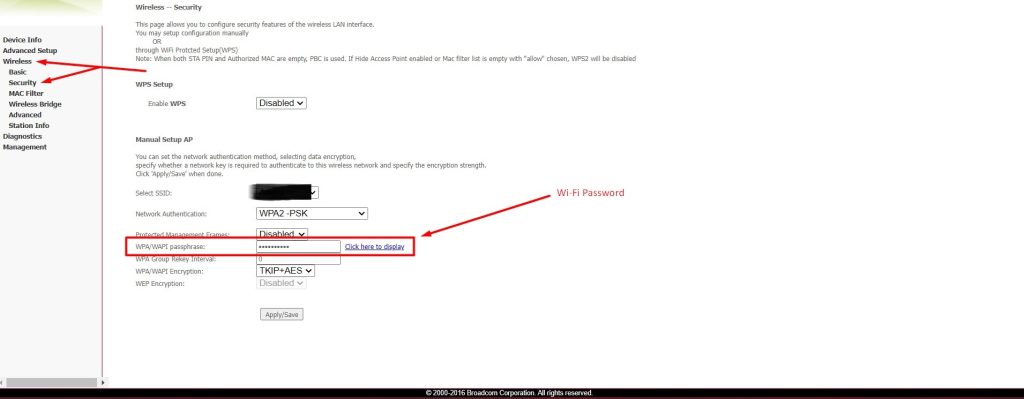
- Now, you’ll see the wireless setting of your router. Find WPA/WAPI passphrase, WPA PreSharedKey, Password, Sharedkey, Passphrase, or anything like that. Actually, it depends on the manufacturer which type of term they use for passwords. Find the password field and enter the strong password for your network.
- Click on the save button, usually placed at the bottom of the page.
- Now, restart the router manually, or some routers restart automatically after a password change.
Congratulations, it’s done.
Once you change the password. All your devices on the network need to be reconnected by using a new password.
Still confused? Contact your ISP or router’s manufacturer for assistance.
How to change the Wi-Fi name?
Changing Wi-Fi passwords makes sense, but changing the user name looks weird. Unfortunately, it’s not weird at all.
Wi-Fi name is also very important; it identifies the network owner and is also safe in terms of security.
In technical terms, the Wi-Fi name is also called SSID (Service Set Identifier). By default, it may be your router’s company name, or you can change it to something like “myHome” or any name you like. Let’s see how to change SSID.
- Open your router’s admin panel by typing the IP address of your router in the web browser.
- Login to the admin panel by using the username and password of the router.
- Locate the Wireless, Wi-Fi, Wireless Security, or WLAN on the page. You can find this on the left menu or top menu of the admin panel.
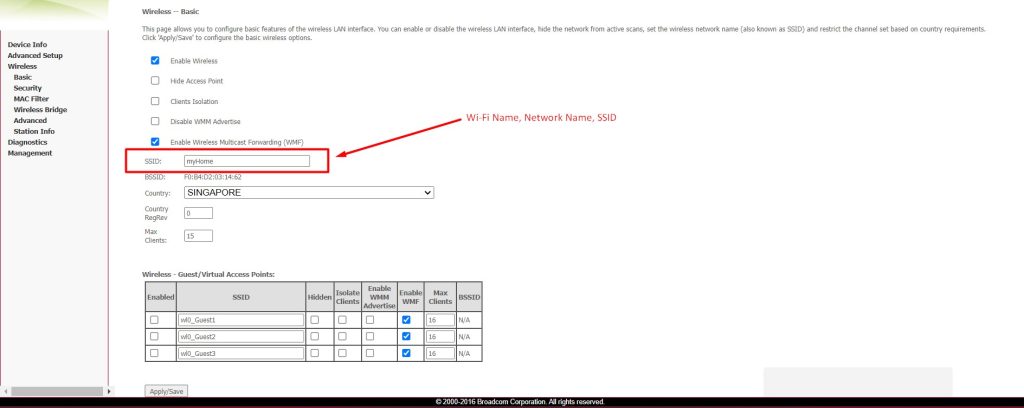
- Locate the terms, such as Wi-Fi name or SSID, on the page. Now, enter the name that you want for your network. Click the save button.
- Now, restart the router manually, or most routers automatically restart upon changing the network name.
It’s all done, Good Luck!
Remember that once you changed the SSID. All your devices on the network need to be reconnected with a new SSID or network.